ShopDreamUp AI ArtDreamUp
Deviation Actions


Description
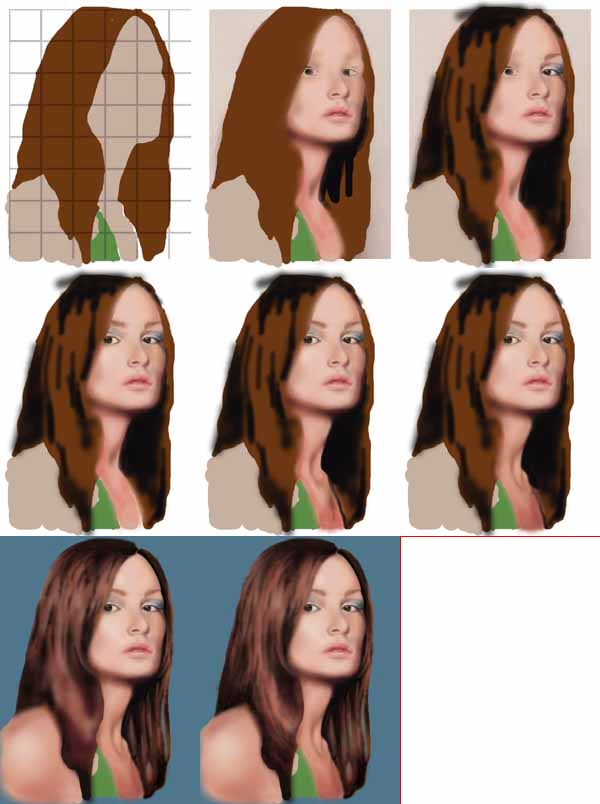
Maybe not strictly speaking a tutorial, but this picture shows some of the steps I took when doing my first digital 'painting'. As you can see in the first frame, I'm using a grid to help with layout. The photograph is not my own, I found it on the internet somewhere.
This picture took several hours to copy.
Here: [link] is a page of some other 'in progress' pics I have worked on, all using photographic source pics and the grid method. None of the photographs were taken by me, except for the eye. WARNING: the page may be quite high bandwidth.
I used Photoshop with a mouse, the main tool being the airbrush, usually set at a very low intensity (around 10%). Many of the later pictures were done using a Wacom graphics tablet. I have the source picture and the one I'm working on open at the same time and side-by-side in the application.
I'm not suggesting there is necessarily any artistic merit to creating a picture in this way, but this is how I work.
Nick.
Image size
600x804px 44.55 KB
© 2004 - 2024 tweaknik
Comments24
Join the community to add your comment. Already a deviant? Log In
Nice work!